Ubuntu Intrepid – ISPConfig 3
Update Repositories
We need to update the aptitude repository indexes. Type the following command to do this:
# sudo aptitude update
Installing Prerequisites
Next we need to install the prerequisite packages for ISPConfig. The following packages will be needed:
- PostFix (postfix, postfix-mysql, postfix-doc)
- MySQL (mysql-client, mysql-server)
- Courier (courier-authdaemon, courier-authlib-mysql, courier-pop, courier-pop-ssl, courier-imap, courier-imap-ssl)
- System Libraries (libsasl2-2, libsasl2-modules, libsasl2-modules-sql, sasl2-bin, libpam-mysql, binutils)
- SSL (openssl)
- Mail Programs (maildrop, getmail4)
- Rootkit Hunter (rkhunter)
# sudo aptitude install postfix postfix-mysql postfix-doc mysql-client mysql-server courier-authdaemon
courier-authlib-mysql courier-pop courier-pop-ssl courier-imap courier-imap-ssl libsasl2-2
libsasl2-modules libsasl2-modules-sql sasl2-bin libpam-mysql openssl maildrop getmail4
rkhunter binutils
During the setup you will be presented the following screens:
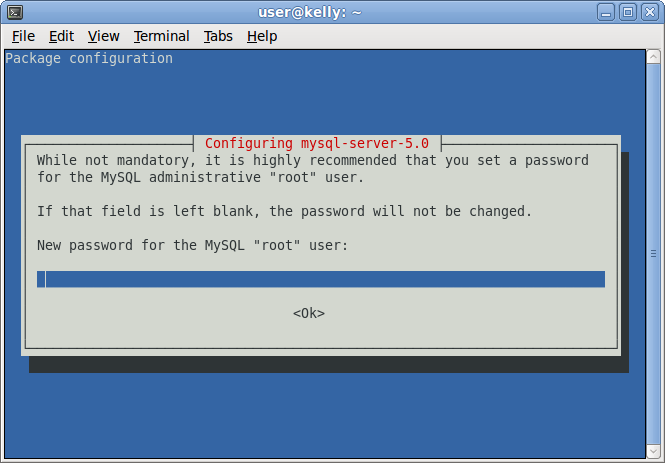
– Enter a password you would like to use for the root user in MySQL.
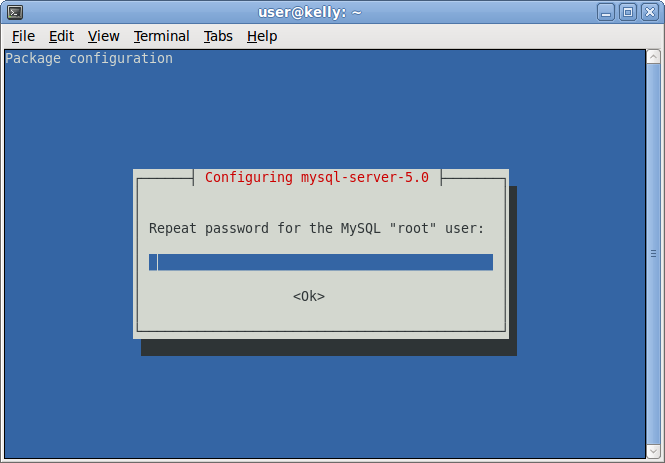
– You will be required to enter the password again.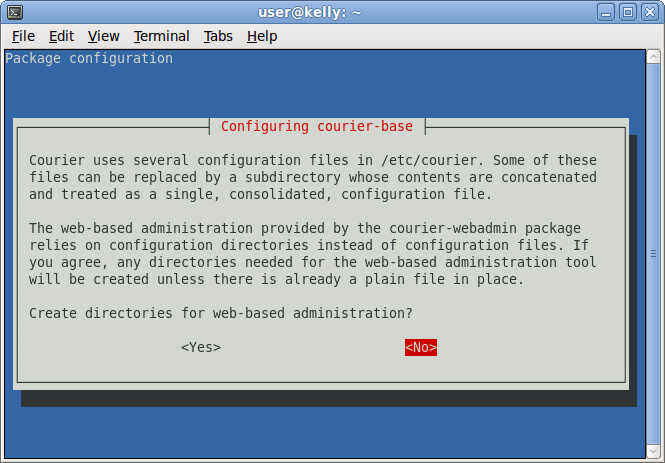
– Select No as we do not want to create the directories.
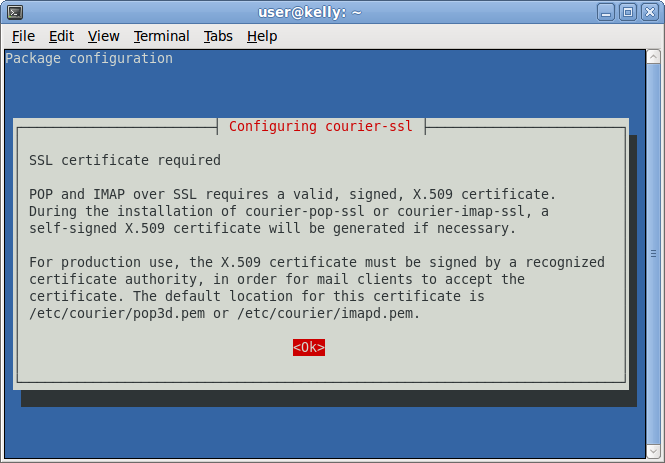
– Read the screen and select OK to continue.
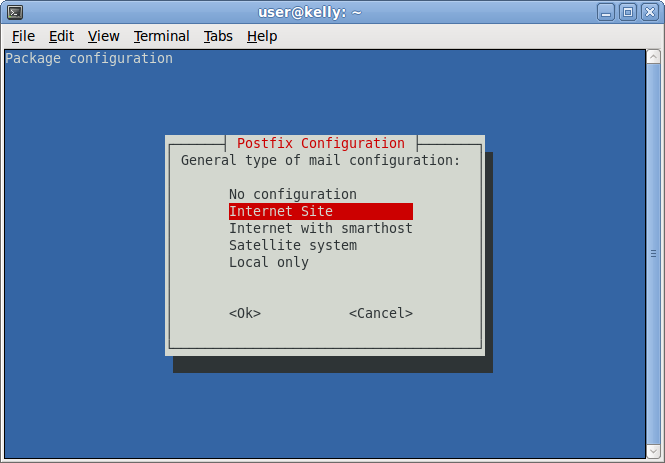
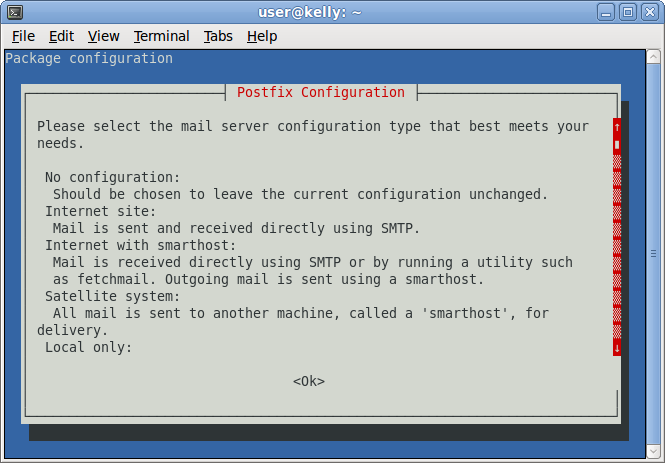
– Select Internet Site as the configuration type.
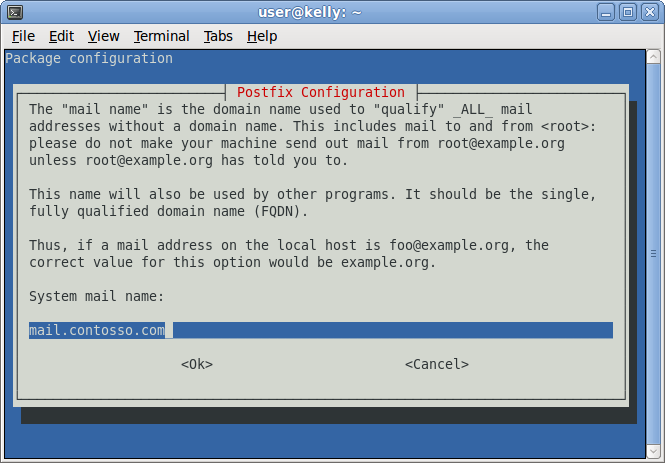
– Enter your server’s hostname here. Keep in mind that it MUST resolve in DNS.
– Select OK on this screen.
Customizing MySQL
Once the installation has completed we will need to modify the MySQL configuration to allow connections from all interfaces instead of localhost only. To open the MySQL configuration file type the following:
# sudo vi /etc/mysql/my.cnf
Find the line that starts with bind-address and comment it out by putting a # in front of it. Save the file and quit.
Now we need to restart MySQL:
# sudo /etc/init.d/mysql restart
Next we will need to make sure that MySQL is answering properly:
# sudo netstat -tap | grep mysql
You should see something that looks like the following:
tcp 0 0 *:mysql *:* LISTEN 9087/mysqld
Configuring Courier
During the installation, the SSL certificates for IMAP-SSL and POP3-SSL were created with the hostname localhost. To change this to the correct hostname (mail.contosso.com in this tutorial), delete the certificates.
# cd /etc/courier
# sudo rm -f imapd.pem
# sudo rm -f pop3d.pem
Next modify the following two files replacing CN=localhost with CN=mail.contosso.com. You may modify the other values as necessary. Replace mail.contosso.com with your real domain.
# sudo vi /etc/courier/imapd.cnf

...

CN=mail.contosso.com
# sudo vi /etc/courier/pop3d.cnf

...

CN=mail.contosso.com
Next we need to recreate the certificates.
# sudo mkimapdcert
# sudo mkpop3dcert
Restart the Courier-IMAP-SSL and Courier-POP3-SSL services.
# sudo /etc/init.d/courier-imap-ssl restart
# sudo /etc/init.d/courier-pop-ssl restart
Install Amavisd-new, SpamAssassin, ClamAV
To install amavisd-new, SpamAssassin, and ClamAV type the following:
# sudo aptitude install amavisd-new spamassassin clamav clamav-daemon zoo unzip bzip2 arj nomarch lzop
cabextract apt-listchanges libnet-ldap-perl libauthen-sasl-perl clamav-docs daemon libio-string-perl
libio-socket-ssl-perl libnet-ident-perl zip libnet-dns-perl
Install Apache, PHP5, phpMyAdmin, FastCGI, suExec, Pear, and mcrypt
We need to install the following components:
- Apache Web Server
- PHP5
- phpMyAdmin MySQL Admin Tool
- FastCGI extensions for Apache
- suExec
- Pear
- mcrypt extensions for PHP
# sudo aptitude apache2 apache2.2-common apache2-doc apache2-mpm-prefork apache2-utils libexpat1
ssl-cert libapache2-mod-php5 php5 php5-common php5-gd php5-mysql php5-imap phpmyadmin php5-cli
php5-cgi libapache2-mod-fcgid apache2-suexec php-pear php-auth php5-mcrypt mcrypt php5-imagick
imagemagick libapache2-mod-suphp
You will be prompted with the following screen:
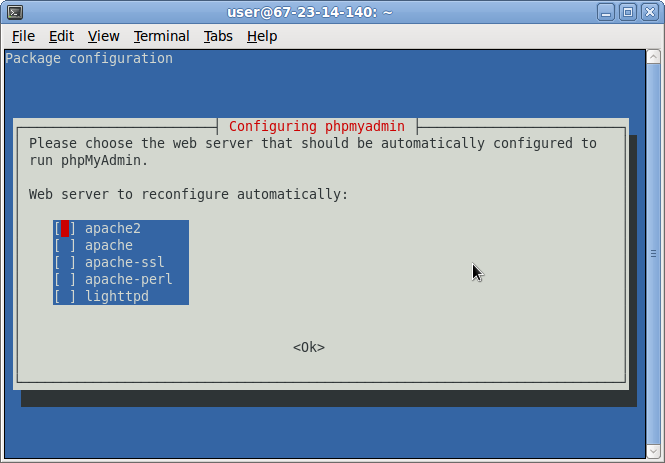
– Select apache2 by pressing the space-bar and select OK.
Activate Apache Modules
Next we will need to activate the following Apache modules: suexec, rewrite, ssl, actions, and include.
# sudo a2enmod suexec rewrite ssl actions include
Secure phpMyAdmin
Now we need to secure phpMyAdmin. Use the following command to delete the setup file:
# sudo rm -f /etc/phpmyadmin/htpasswd.setup
Next we need to modify the Apache configuration to remove the setup portion of phpMyAdmin.
# sudo vi /etc/phpmyadmin/apache.conf
Remove or comment out the following section:
       # Authorize for setup
       <Files setup.php>
           # For Apache 1.3 and 2.0
           <IfModule mod_auth.c>

               AuthType Basic
               AuthName "phpMyAdmin Setup"
               AuthUserFile /etc/phpmyadmin/htpasswd.setup
           </IfModule>
           # For Apache 2.2
           <IfModule mod_authn_file.c>
               AuthType Basic
               AuthName "phpMyAdmin Setup"
               AuthUserFile /etc/phpmyadmin/htpasswd.setup
           </IfModule>

           Require valid-user
       </Files>
Now we need to restart Apache:
# sudo /etc/init.d/apache2 restart
Installing PureFTPd with Quotas
We need to allow FTP access with quota support. To accomplish this we will install PureFTPd. Use the following command:
# sudo aptitude install pure-ftpd-common pure-ftpd-mysql quota quotatool
Next we need to make a few changes to the configuration of PureFTPd. Edit /etc/default/pure-ftpd-common:
# sudo vi /etc/default/pure-ftpd-common
Make sure that STANDALONE_OR_INETD is set to standalone and VIRTUALCHROOT is set to true.
Save the file if you made any changes.
Restart PureFTPd:
# sudo /etc/init.d/pure-ftpd-mysql restart
Next we will enable quotas on our file system. First we need to modify our filesystem structure to support quotas. Let’s modify /etc/fstab to add support.
# sudo vi /etc/fstab
On the line that starts with either /dev/sda1 or /dev/xvda1 we need to add ,usrquota,grpquota right after noatime in the arguments. For example, it should look like the following when you’re done if the device is /dev/sda1:
/dev/sda1 / ext3 defaults,errors=remount-ro,noatime,usrquota,grpquota 0 1
Next we need to enable quotas:
# sudo touch /quota.user /quota.group
# sudo chmod 600 /quota.*
# sudo mount -o remount /
We’ll run a few utilities to make sure quotas are setup correctly:
# sudo quotacheck -avugm
# sudo quotaon -avug
Installing MyDNS
Before we can install MyDNS we need to install a few prequisites:
# sudo aptitude install g++ libc6 gcc gawk make texinfo libmysqlclient15-dev
MyDNS is not available in the Ubuntu 8.10 repository so we will have to install it ourselves. It is assumed you have the URL to the current version from the MyDNS website.
# cd /tmp
# sudo wget http://heanet.dl.sourceforge.net/sourceforge/mydns-ng/mydns-1.2.8.27.tar.gz
# sudo tar xvfz mydns-1.2.8.27.tar.gz
# cd mydns-1.2.8
# sudo ./configure
# sudo make
# sudo make install
Now we need to create a start/stop script for MyDNS:
To create the file:
# sudo vi /etc/init.d/mydns
Copy the following text into this file:
#! /bin/sh
#
# mydns         Start the MyDNS server
#
# Author:       Philipp Kern <[email protected]>.
#               Based upon skeleton 1.9.4 by Miquel van Smoorenburg
#               <[email protected]> and Ian Murdock <[email protected]>.
#

set -e

PATH=/usr/local/sbin:/usr/local/bin:/sbin:/bin:/usr/sbin:/usr/bin
DAEMON=/usr/local/sbin/mydns
NAME=mydns
DESC="DNS server"

SCRIPTNAME=/etc/init.d/$NAME

# Gracefully exit if the package has been removed.
test -x $DAEMON || exit 0

case "$1" in
  start)
        echo -n "Starting $DESC: $NAME"

        start-stop-daemon --start --quiet \
                --exec $DAEMON -- -b
        echo "."
        ;;
  stop)
        echo -n "Stopping $DESC: $NAME"
        start-stop-daemon --stop --oknodo --quiet \
                --exec $DAEMON
        echo "."
        ;;
  reload|force-reload)
        echo -n "Reloading $DESC configuration..."
        start-stop-daemon --stop --signal HUP --quiet \
                --exec $DAEMON
        echo "done."

        ;;
  restart)
        echo -n "Restarting $DESC: $NAME"
        start-stop-daemon --stop --quiet --oknodo \
                --exec $DAEMON
        sleep 1
        start-stop-daemon --start --quiet \
                --exec $DAEMON -- -b
        echo "."
        ;;
  *)
        echo "Usage: $SCRIPTNAME {start|stop|restart|reload|force-reload}" >&2
        exit 1
        ;;
esac

exit 0
Next we need to make the file executable and add startup links for it.
# sudo chmod +x /etc/init.d/mydns
# sudo update-rc.d mydns defaults
Installing Vlogger and Webalizer
Use the following commands to install:
# sudo aptitude install vlogger webalizer
Installing fail2ban
This is optional but recommended. ISPConfig monitor will attempt to show the fail2ban log.
# sudo aptitude install fail2ban
Installing SquirrelMail
To install the SquirrelMail webmail client use the following:
# sudo aptitude install squirrelmail
Now we need to create a symbolic link…
# sudo ln -s /usr/share/squirrelmail/ /var/www/webmail
Use the following to configure SquirrelMail:
# sudo squirrelmail-configure
You should see a screen that looks like the following:
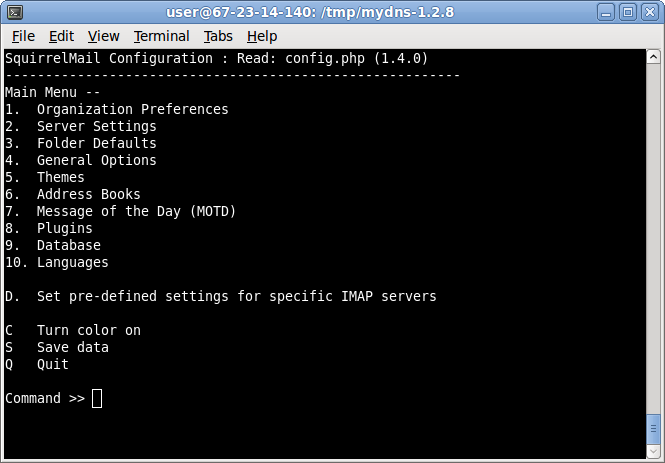
– We need to tell SquirrelMail that we are using Courier-IMAP/POP3. At the prompt enter D and press Enter.
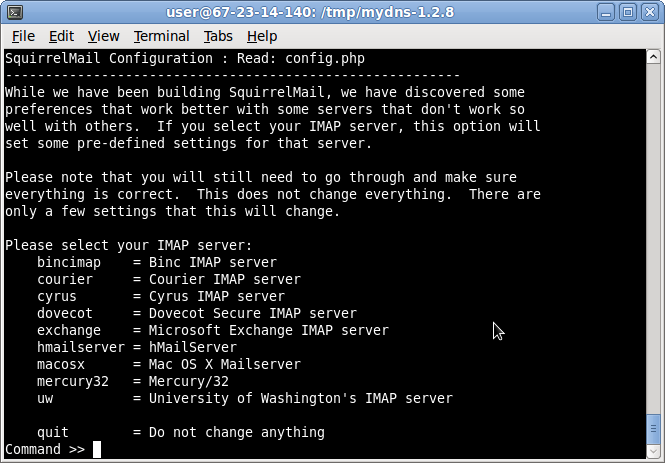
– Enter courier here to tell it to use Courier.
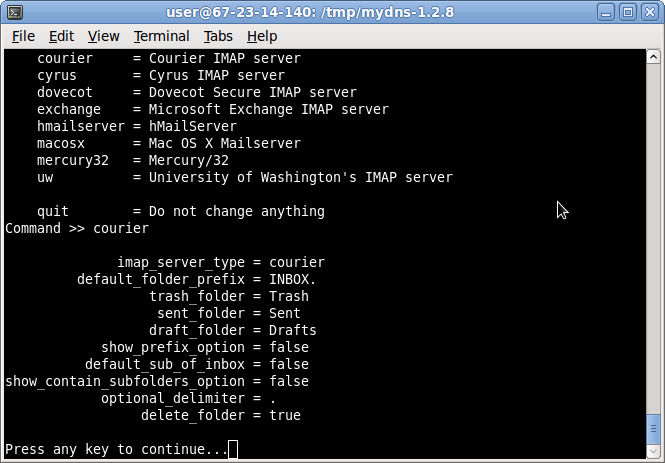
– Press any key at the screen to continue.

– Press S here to save the configuration.
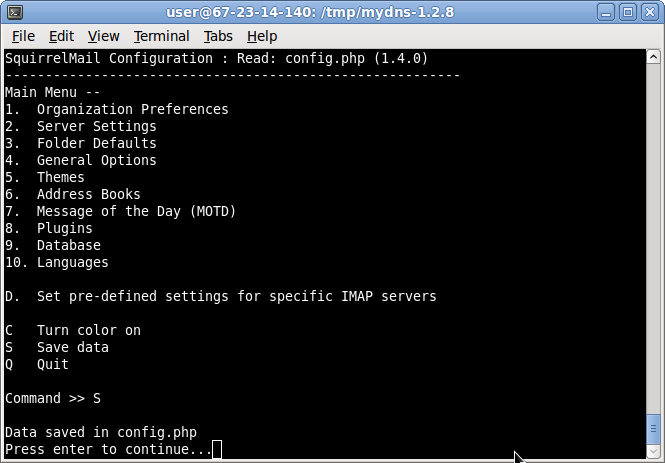
– Press a key here.
– Press Q here to quit.
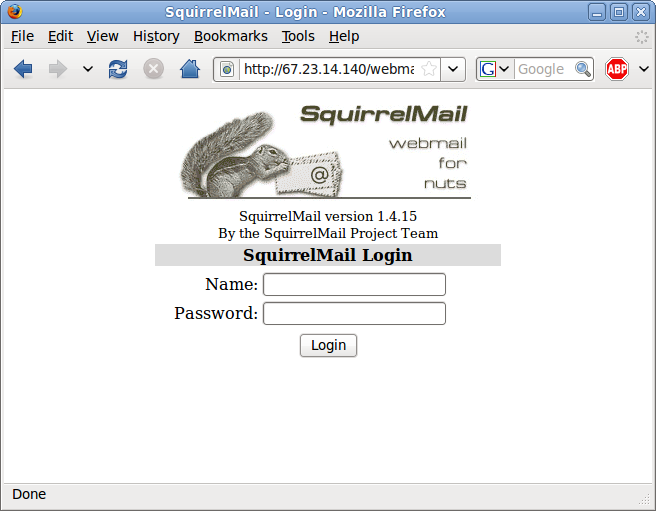
Now we need to test our Squirrel Mail configuration to make sure it loads. You can verify by sending your web browser tohttp://your_domain/webmail. Replace >your_domain with your fully qualified domain name.
Installing ISPConfig 3
ISPConfig 3 is not available in the Ubuntu 8.10 repositories so we will have to install it manually. You must download the current version from the [ISPConfig download page].
# cd /tmp
# sudo wget http://softlayer.dl.sourceforge.net/sourceforge/ispconfig/ISPConfig-3.0.1.1.tar.gz
# sudo tar zxvf ISPConfig-3.0.1.1.tar.gz
# cd ispconfig3_install/install/
# sudo php -q install.php
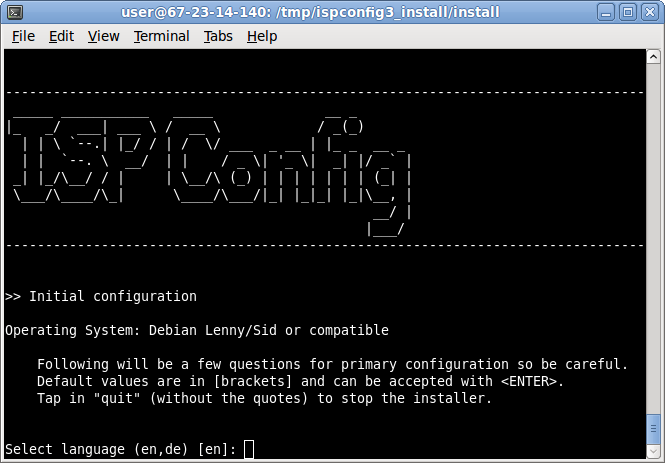
– Press enter to accept en.
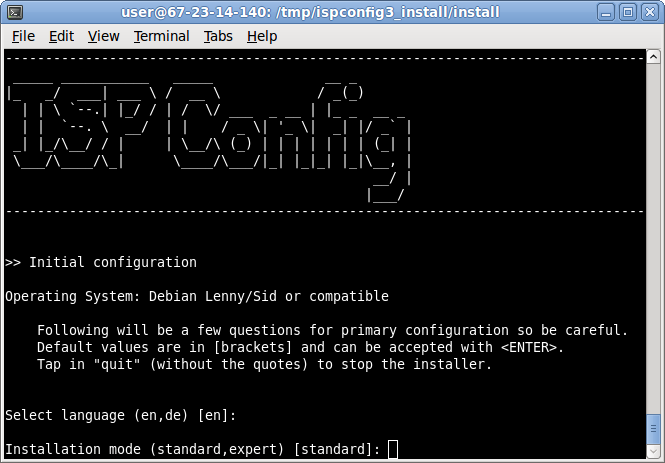
– Press enter to accept the standard installation.
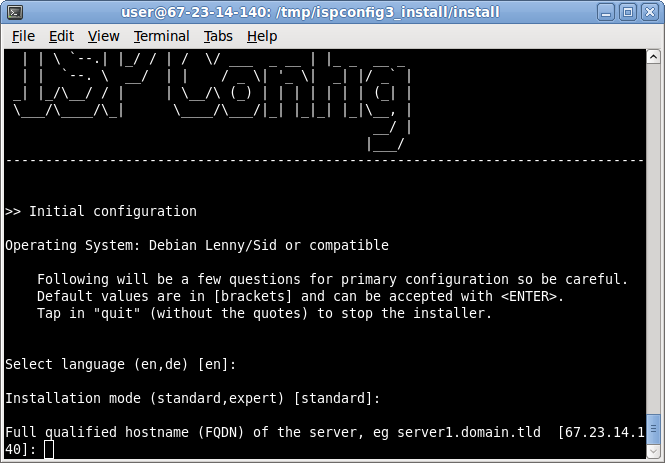
– Enter your fully qualified host name. The default value pulled from your server will be the default. Press enter if you would like to accept.
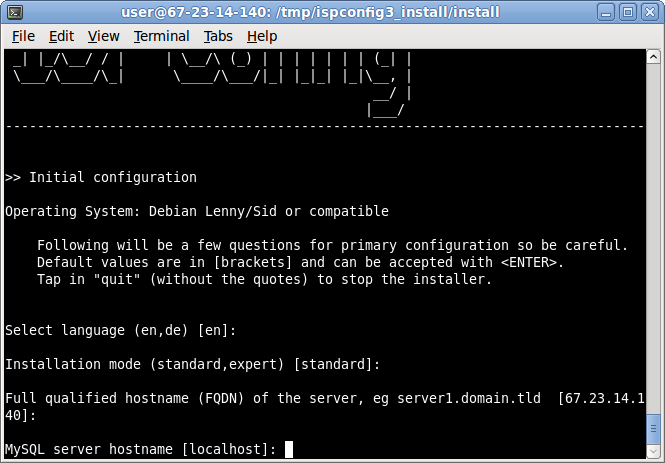
– Press enter because MySQL is installed on the same server.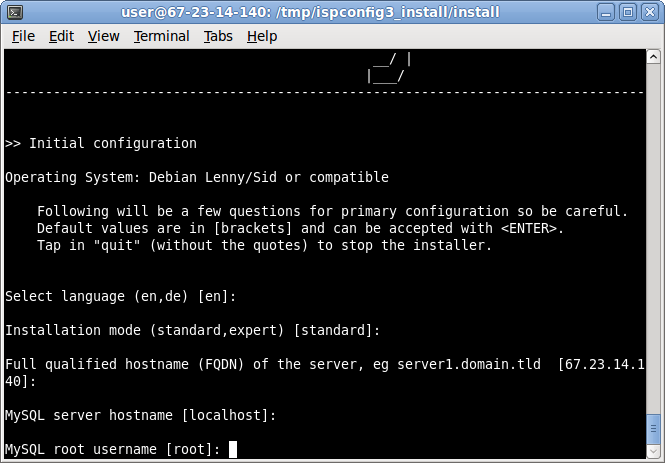
– Press enter to use the default username of root for the MySQL connection.
– Press enter to use the default password for MySQL. It has not been configured yet.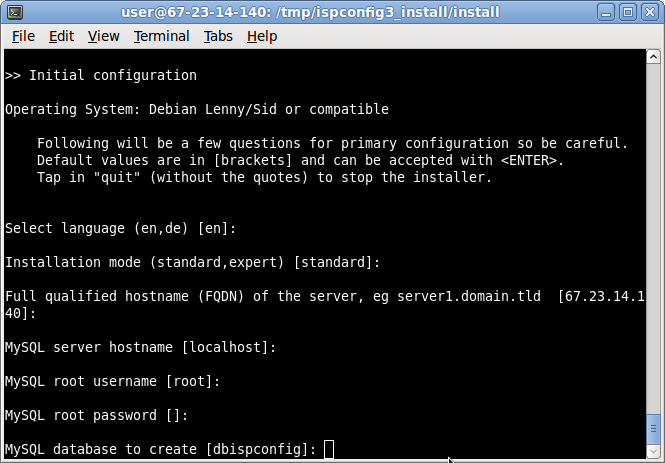
– Press enter to accept the default MySQL database name.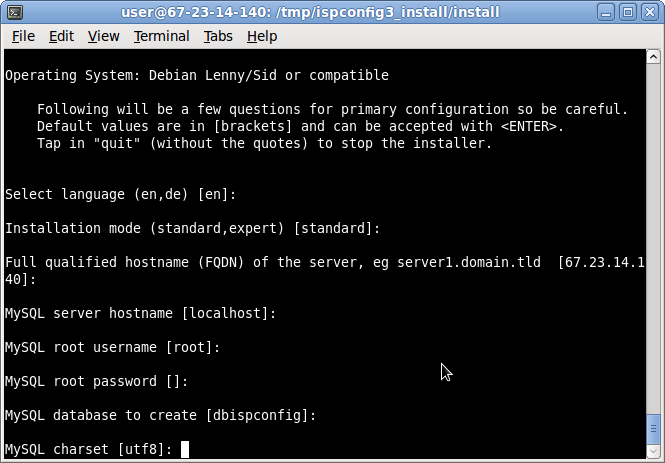
– Press enter to accept the default MySQL character set.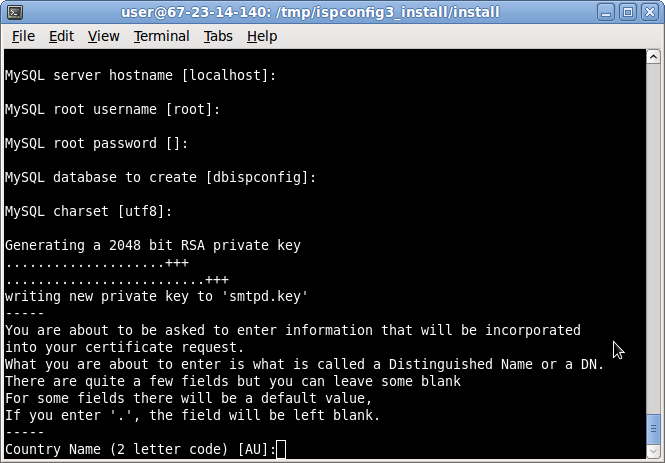
– Type US for the country code.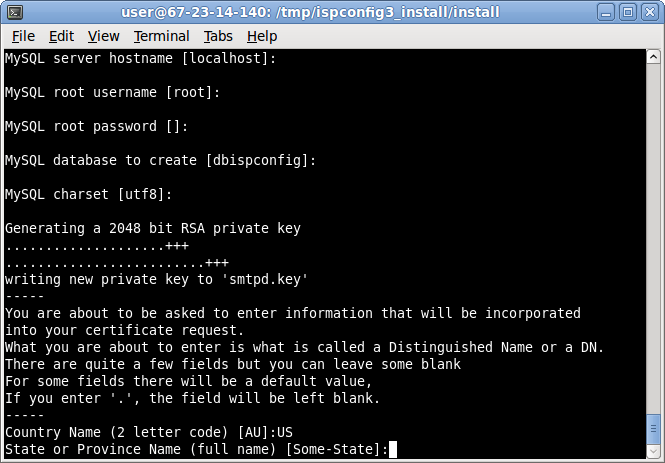
– Enter your state name.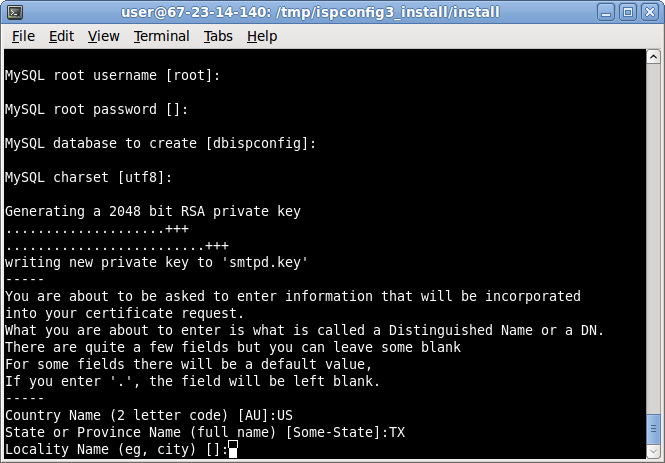
– Enter your city name.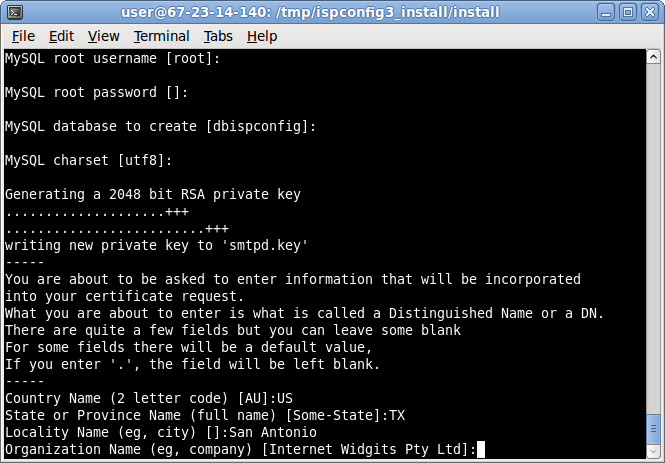
– Enter your organization’s name.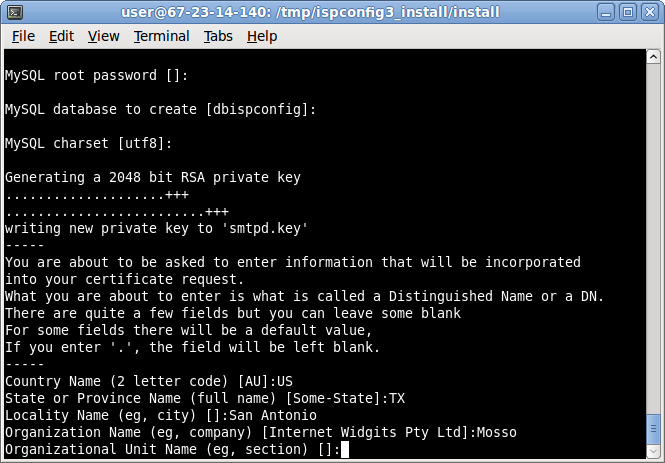
– Enter your department, if applicable.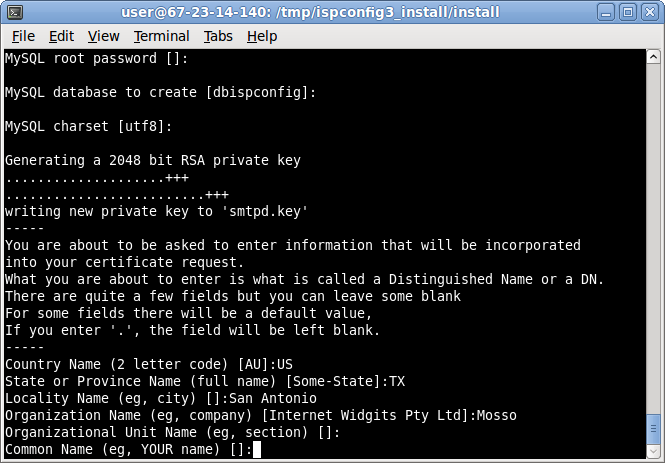
– Enter a representative name for your company.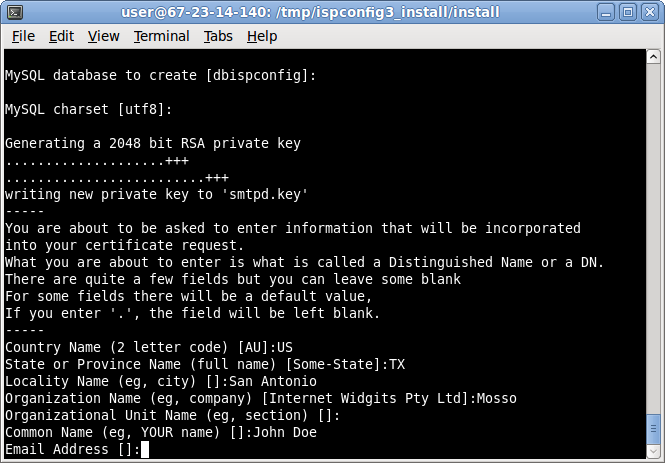
– Enter a primary contact e-mail for the certificate.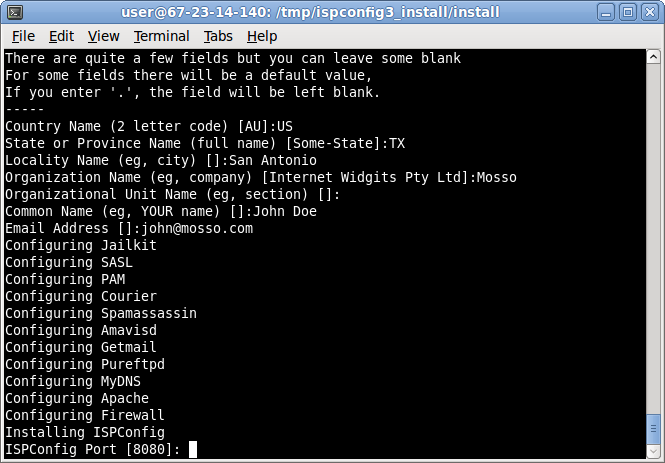
– Select the default port of 8080.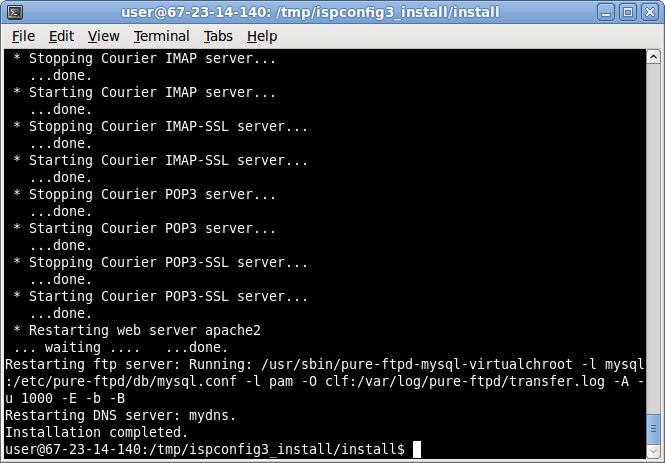
– Upon successful completion you should have a screen that looks similar to the screen above.
Testing
You may now log into ISPConfig for the first time. Point your web browser to http://your_domain:8080 replacingyour_domain with your domain name. You should see a window that looks similar to the one below.