monit install and setup
Step 1: Installing Monit
By default, Monit tool is not available from the system base repositories, you need to add and enable third partyepel repository to install monit package under your RHEL/CentOS systems. Once you’ve added epel repository, install package by running the following yum command. For Ubuntu/Debian/Linux Mint user’s can easily install using apt-get command as shown.
On RedHat/CentOS/Fedora/
# yum install monit
On Ubuntu/Debian/Linux Mint
$ sudo apt-get install monit
Step 2: Configuring Monit
Monit is very easy to configure, in fact the configuration files are created to be very easily readable and making them easier for users to understand. It is designed to monitor the running services in every 2 minutes and keeps the logs in “/var/log/monit“.
Monit has it’s web interface that runs on port 2812 using web server. To enable web interface you need to make changes in monit configuration file. The main configuration file of monit located at /etc/monit.conf under (RedHat/CentOS/Fedora) and /etc/monit/monitrc file for (Ubuntu/Debian/Linux Mint). Open this file using your choice of editor.
# vi /etc/monit.conf
$ sudo vi /etc/monit/monitrc
Next, uncomment the following section and add the IP address or domain name of your server, allow anyone to connect and change monit user and password or you can use default ones.
 set httpd port 2812 and
     use address localhost  # only accept connection from localhost
     allow localhost        # allow localhost to connect to the server and
     allow admin:monit      # require user 'admin' with password 'monit'
     allow @monit           # allow users of group 'monit' to connect (rw)
     allow @users readonly  # allow users of group 'users' to connect readonly
Once you’ve configured it, you need to start the monit service to reload the new configuration settings.
# /etc/init.d/monit start
$ sudo /etc/init.d/monit start
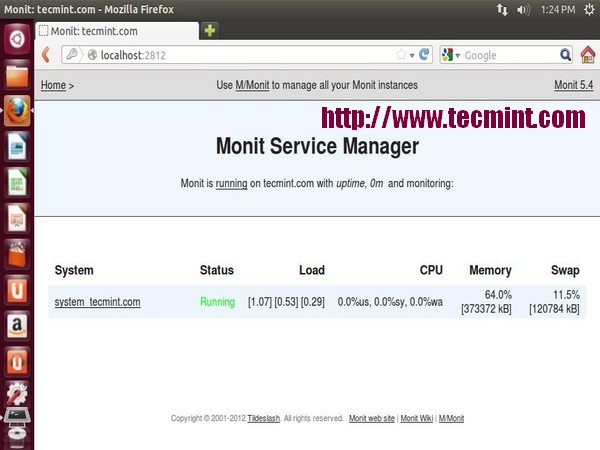
Now, you will able to access the monit web interface by navigating to the “http://localhost:2812” or “http://example.com:2812“. Then enter user name as “admin” and password as “monit“. You should get screen similar to below.
Step 3: Adding Monitoring Services
Once monit web interface correctly setup, start adding the programs that you want to monitor into the/etc/monit.conf under (RedHat/CentOS/Fedora) and /etc/monit/monitrc file for (Ubuntu/Debian/Linux Mint) at the bottom.
Following are some useful configuration examples for monit, that can be very helpful to see how a service is running, where it keeps its pidfile and how to start and stop a service etc.
Apache
check process httpd with pidfile /var/run/httpd.pid
group apache
start program = "/etc/init.d/httpd start"
stop program = "/etc/init.d/httpd stop"
if failed host 127.0.0.1 port 80
protocol http then restart
if 5 restarts within 5 cycles then timeout
Apache2
check process apache with pidfile /run/apache2.pid
start program = "/etc/init.d/apache2 start" with timeout 60 seconds
stop program  = "/etc/init.d/apache2 stop"
Nginx
check process nginx with pidfile /var/run/nginx.pid
start program = "/etc/init.d/nginx start"
stop program = "/etc/init.d/nginx stop"
MySQL
check process mysqld with pidfile /var/run/mysqld/mysqld.pid
group mysql
start program = "/etc/init.d/mysqld start"
stop program = "/etc/init.d/mysqld stop"
if failed host 127.0.0.1 port 3306 then restart
if 5 restarts within 5 cycles then timeout
SSHD
check process sshd with pidfile /var/run/sshd.pid
start program "/etc/init.d/sshd start"
stop program "/etc/init.d/sshd stop"
if failed host 127.0.0.1 port 22 protocol ssh then restart
if 5 restarts within 5 cycles then timeout
Once you’ve configured all programs for monitoring, check monit syntax for errors. If found any errors fix them, it’s not so tough to figure out what’s went wrong. When you get message like “Control file syntax OK“, or if you see no errors, you can proceed ahead.
# monit -t
$ sudo monit -t
After fixing all possible errors, you can type the following command to start the monit service.
# /etc/init.d/monit restart
$ sudo /etc/init.d/monit restart
You can verify that monit service is started by checking log file.
# tail -f /var/log/monit
$ sudo tail -f /var/log/monit.log
Sample Output
[BDT Apr  3 03:06:04] info     : Starting monit HTTP server at [localhost:2812]
[BDT Apr  3 03:06:04] info     : monit HTTP server started
[BDT Apr  3 03:06:04] info     : 'tecmint.com' Monit started
[BDT Apr  3 03:06:04] error    : 'nginx' process is not running
[BDT Apr  3 03:06:04] info     : 'nginx' trying to restart
[BDT Apr  3 03:06:04] info     : 'nginx' start: /etc/init.d/nginx
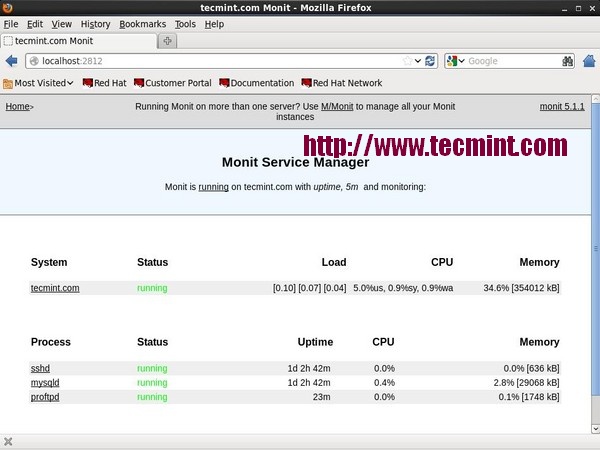
Monit Screenshot
This is how looks monit after adding all process for monitoring.